Getting Started with Azure and OpenAI
Introduction
OpenAI’s advanced language models are now available on Microsoft’s Azure cloud platform, allowing developers to integrate these powerful tools into their own cloud environment. This opens up opportunities for creating intelligent chatbots, automating content generation, and building AI-powered applications.
Microsoft’s announcement has made it possible for users to access and utilize OpenAI’s large language models (LLMs) directly through Azure. In this guide, we’ll provide a step-by-step process for setting up and leveraging these AI models, enabling you to explore new possibilities for innovation and development within your Azure environment.
1. Apply for access to Azure OpenAI
- Create an Azure account if necessary
- Fill in the application form at
https://aka.ms/oai/access
2. Add OpenAI model to Azure account
This requires two steps: creating a “resource” and then creating a “model deployment” within that resource.
Be aware that some Azure operations can take a while to complete. If any of the following steps appear not to work, wait a while before attempting deletion and starting fresh.
2.1 Create a Resource
In the Azure Portal screen portal.azure.com shown below:
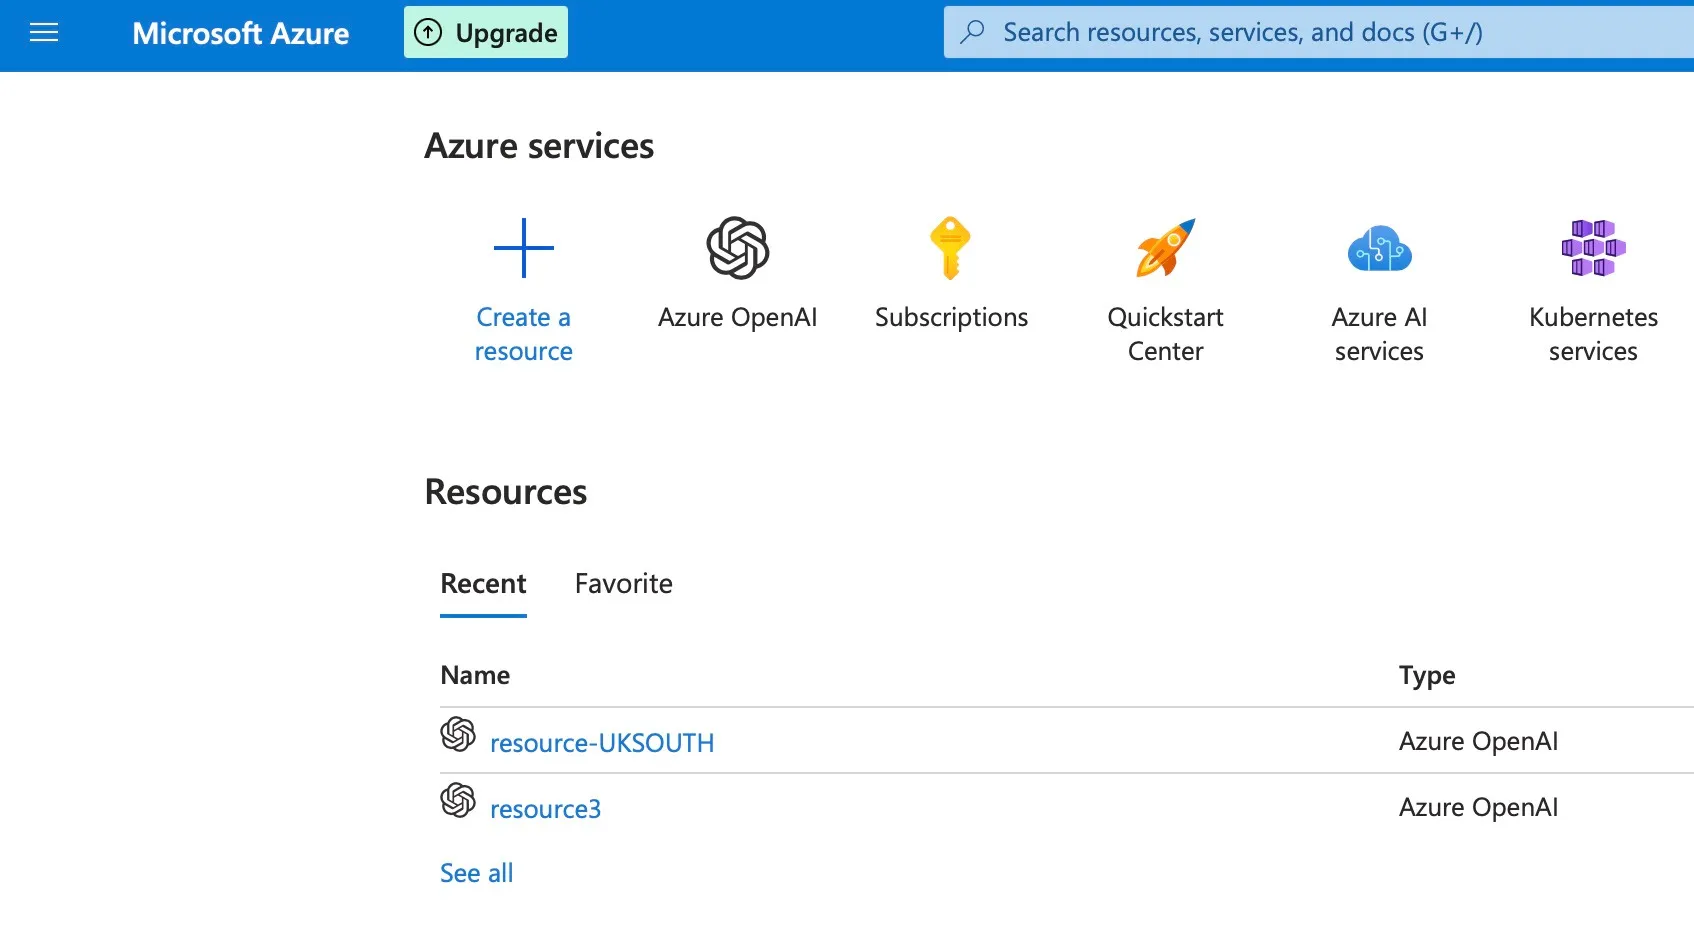
Perform the following steps:
- Click “Create a resource” (towards top left of screen, big plus sign)
- Enter “OpenAI” into the search box, icons should appear below it including “Azure OpenAI”
- Click the “Azure OpenAI” icon then click “create”, and complete the resource details as shown below:
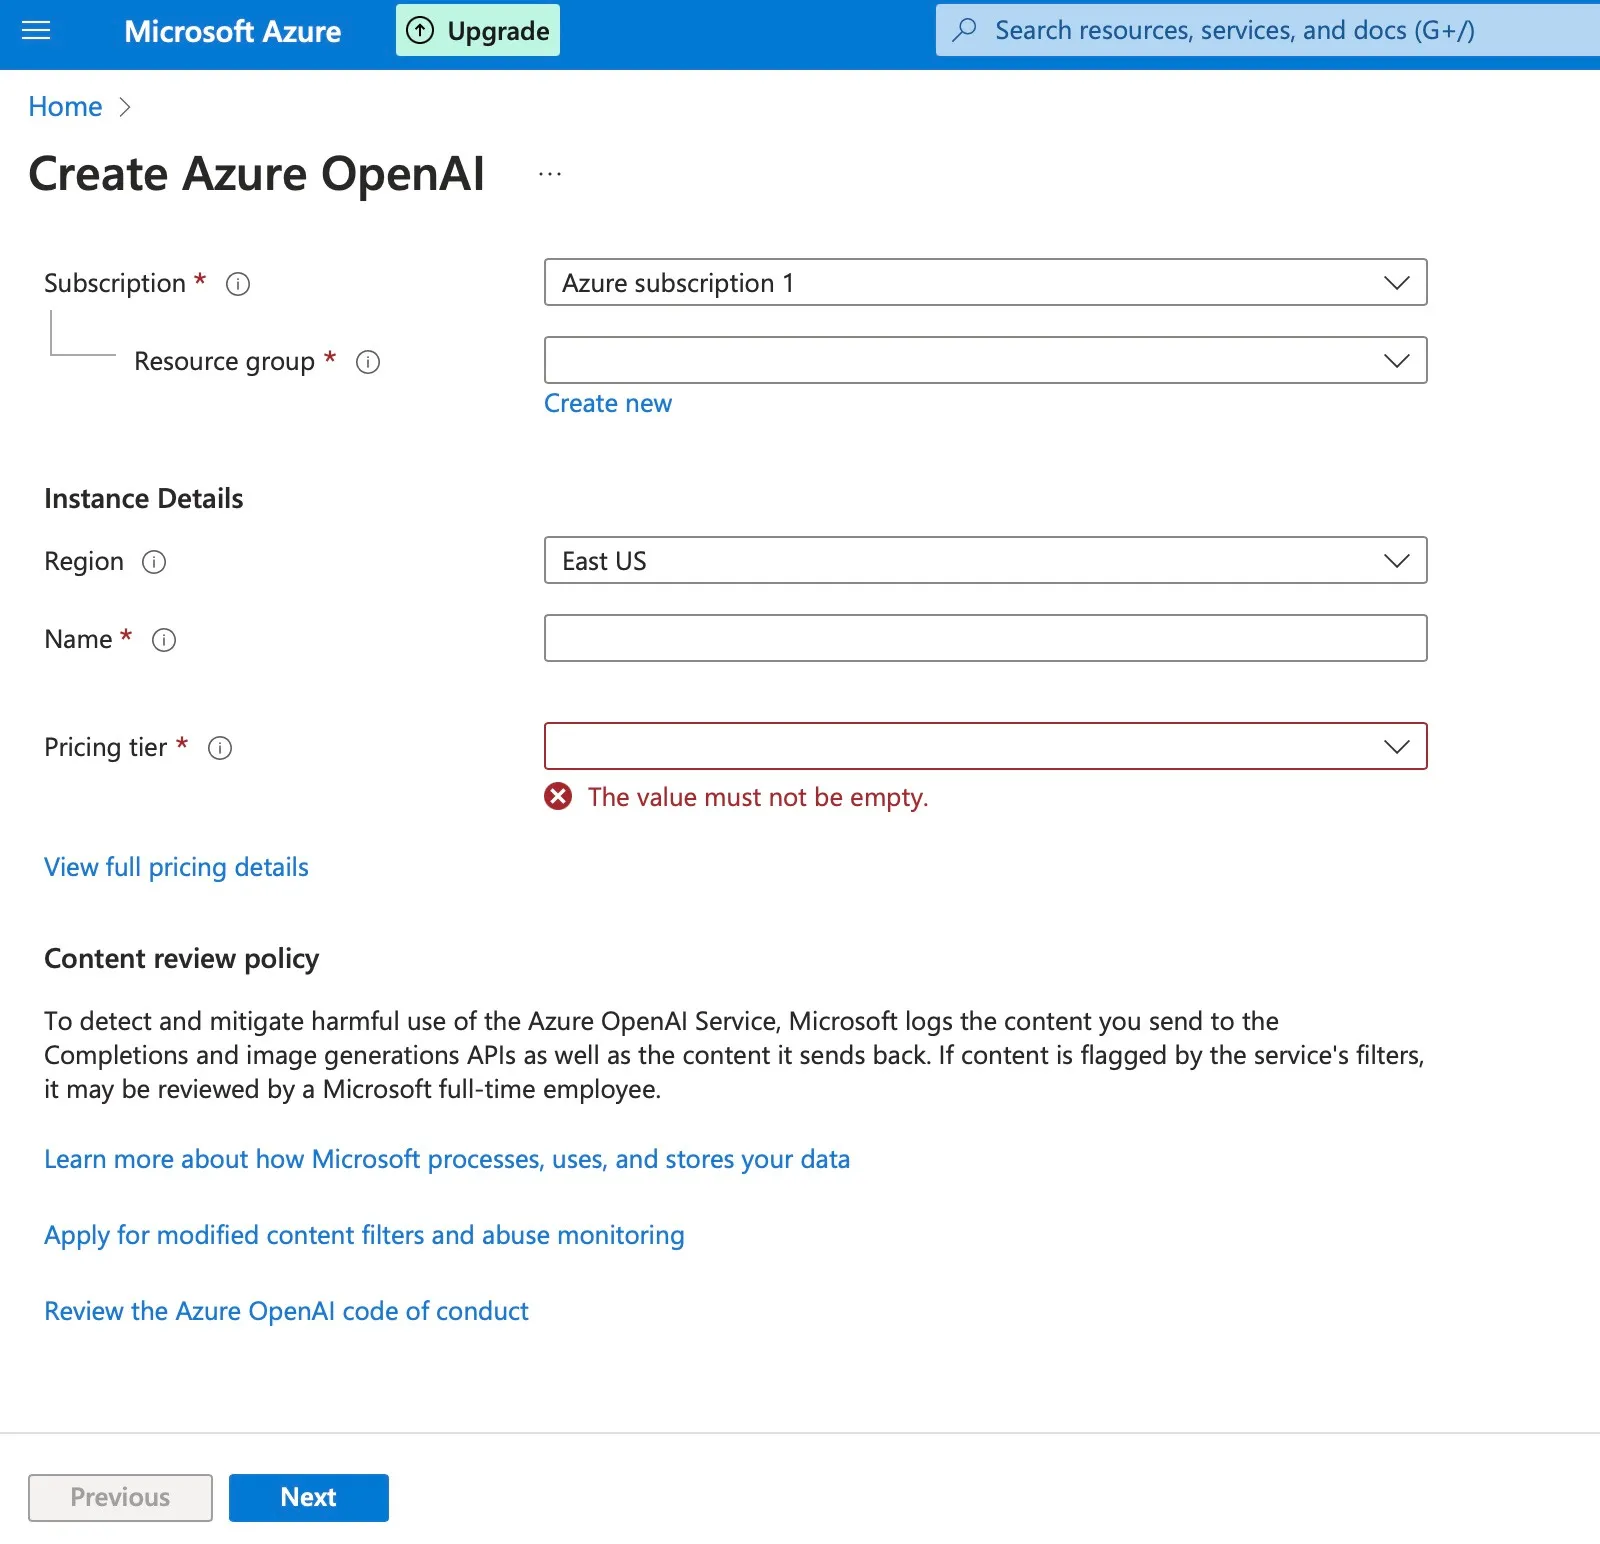
Enter the following values:
- For “Resource group” click “Create new”, or if you already have a resource group then choose it from the dropdown.
- Choose the required region and pricing tier
- Enter a name for your resource, eg
azoai-UKSOUTH-resource - Note the policies and conditions and if happy click “Next” for the remaining steps.
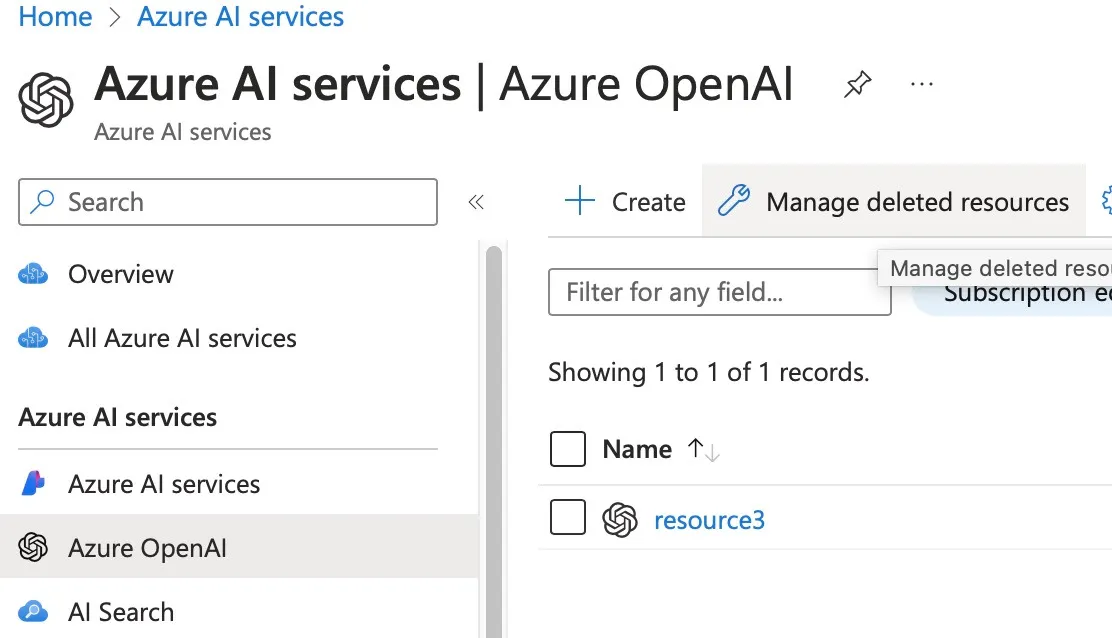
Note that some Azure accounts only allow one resource to be created in each region. If you encounter problems and need to delete the resource and start afresh, click the resource in the Azure Portal home page portal.azure.com and click the delete (dustbin) icon. Then on the Azure Portal home page click the “Azure Open AI” icon (or find it in the top search bar if not visible). Click “Manage deleted resources” to permanently delete the resource, as shown below:
- On the Azure Portal home page, click the “Azure Open AI” icon (or find it in the top search bar if not visible) and click the resource that you created above.
- From the left-hand menu list click “Keys and Endpoints” then “Show Keys”
- Make a note of the endpoint and one of the keys (either key will suffice). You will use these two parameters later for connecting to the model. Do not store the key in an accessible file. If you must store it in a file, limit its access permissions and add it to your
.gitignoreso as not to distribute it.
2.2 Create a “Model deployment”
Again in the Azure Portal portal.azure.com, do the following:
- Click the “Azure Open AI” icon (or find it in the top search bar if not visible) and click the resource that you created in the previous step.
- From the left-hand menu list click “Model deployments” then “Manage Deployments” to open the Azure OpenAI Studio (or open an additional browser tab at
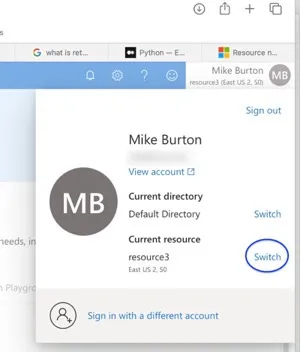
oai.azure.comif you want to keep the Azure Portal tab open) - At the top right of the screen click your Azure username and beside “Current resource” click “switch” to select the resource you created in the previous step, as shown below:
- In the left hand menu of Azure OpenAI Studio click “Deployments” which is under “Management”, then click “Create new deployment”. This should show a screen similar to:
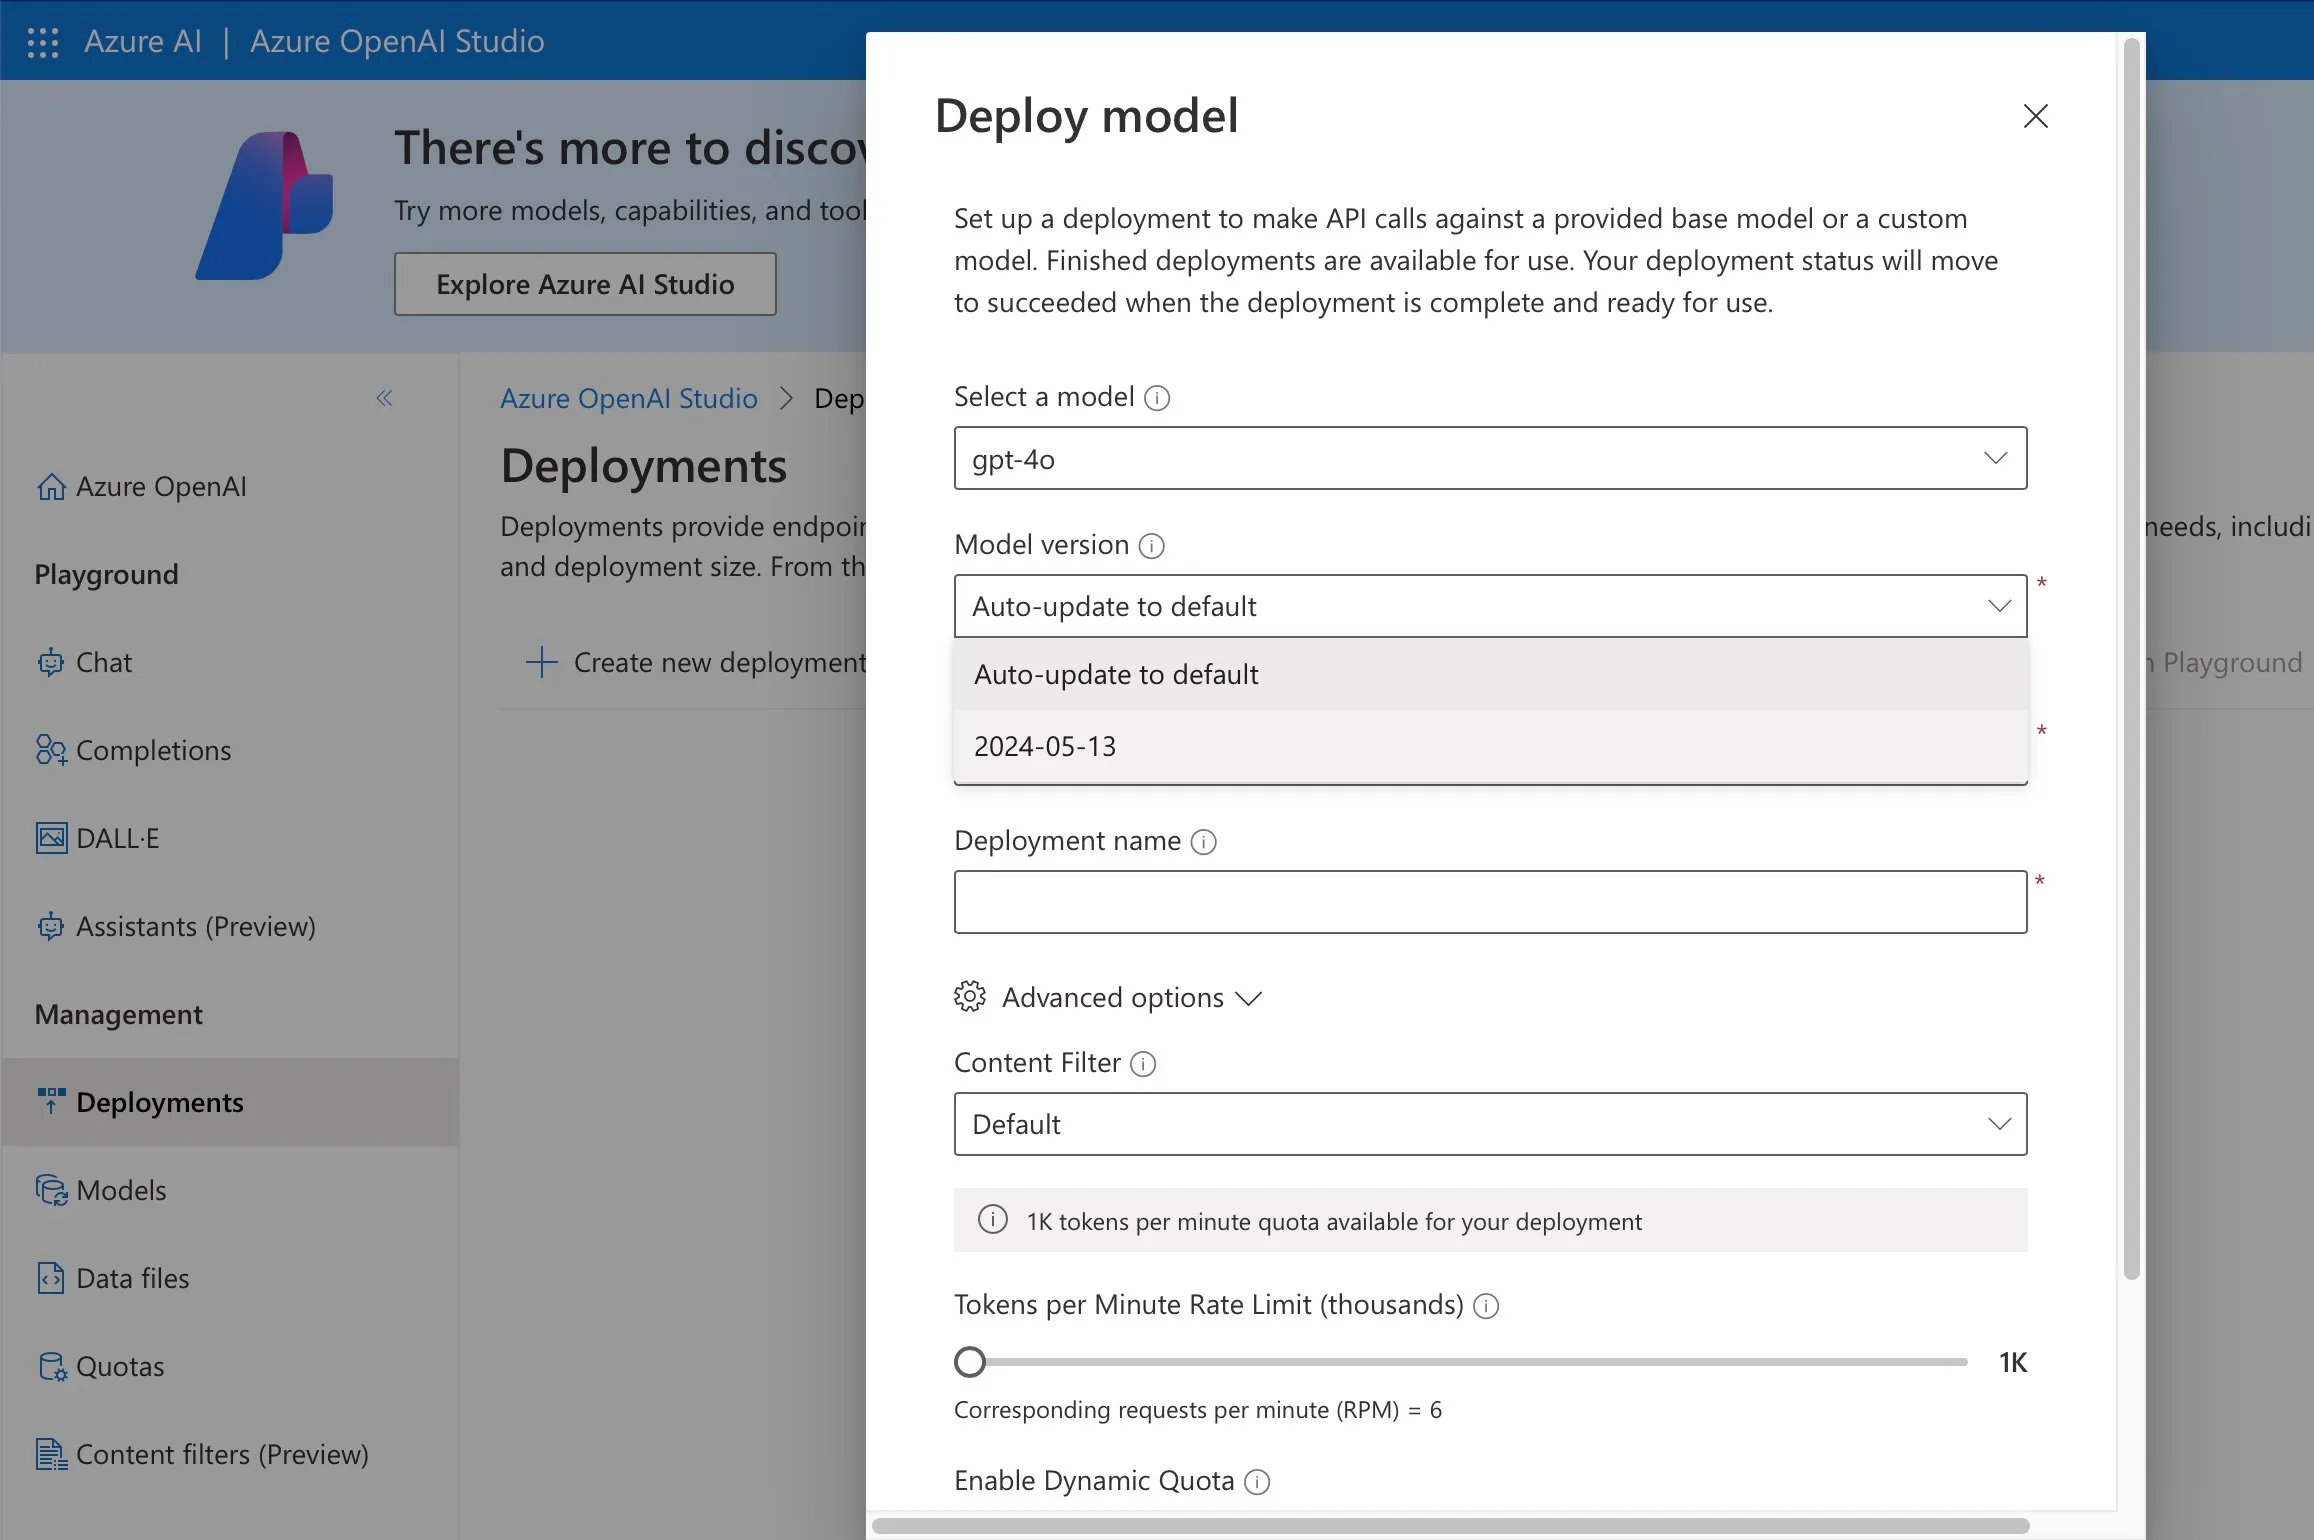
- Select the required model such as GPT-4 and enter a name for the deployment such as
deployment-UK-gpt4, then click “Create”. - After the deployment has been created, click its name in the “Deployments” page. Note the model name, which will be needed for connecting to the model.
3. Configure Python
Download and install the latest version of Python for your system from https://python.org, and consult the documentation at https://docs.python.org/3/using (especially if using a Mac).
The next steps can run under any Python version, and will create a Python 3 virtual environment containing the Python binaries and libraries that we need.
On Windows, depending on how Python was installed, the python binary might be called py instead of python, so adjust the following commands accordingly.
-
Create a virtual environment with a name of your choice such as
azoai_env, referring to the full path of your Python 3 executable. You can find your Python 3 path by using thewhichcommand (or on Windows examine the output of thepathcommand for python-related commands and search around that location for executables). Then type a command like:python -m virtualenv -p=<path to python3 executable> <venv_name>eg:python -m virtualenv -p=/usr/local/bin/python3.12 azoai_venv -
Activate the virtual environment by typing:
source <venv_name>/bin/activateOr on Windows:<venv_name>\Scripts\activateeg:source azoai_venv/bin/activate
Check the installation by typing: python --version
This should show something like: Python 3.12.3
-
Create a
required_libs.txtfile to specify the Python libraries that we will need, containing this text:notebook openai python-dotenv Pillow -
Install the libraries by typing:
python -m pip install -r required_libs.txt
The following sample environment values are taken from the examples in the above Azure configuration steps. Replace them with your own values as appropriate.
-
Define environment variables for the AzureOpenAI constructor parameters
api_keyandazure_endpoint, as noted from the last part of the Azure “Create a Resource” section above, eg:export AZURE_OPENAI_API_KEY=<the key>
export AZURE_OPENAI_ENDPOINT=https://azoai-uksouth-resource.openai.azure.com -
Likewise define an environment variable for the
api_versionparameter, egexport AZURE_OPENAI_API_VERSION=<version>The API version is not part of your Azure resource or model deployment configuration. Instead, choose a recent version from:https://learn.microsoft.com/en-us/azure/ai-services/openai/reference -
Define an environment variable for the “Model deployment” that you created in the “Create a Model deployment” step above, eg:
export AZURE_OPENAI_MODEL=deployment-UK-gpt4Note that this is the name of the “Model deployment”, not the name of the underlying LLM model. -
Test your configuration by running the
azoai_setup.pysample code below. This reads the above environment variables in order to locate and run the AI model.
# azoai_setup.py - Simple program to test the setup

import os
from openai import AzureOpenAI
from dotenv import load_dotenv, find_dotenv

env = load_dotenv(find_dotenv())

client = AzureOpenAI(
  api_key = os.environ.get("AZURE_OPENAI_API_KEY"),
  azure_endpoint = os.environ.get("AZURE_OPENAI_ENDPOINT"),
  api_version = os.environ.get("AZURE_OPENAI_API_VERSION")
)

response = client.chat.completions.create(
    model=os.environ.get("AZURE_OPENAI_MODEL"),
    messages = [
        {"role": "user", "content": "What is the capital of Austria?"}
    ]
)

print(response.choices[0].message.content)
Conclusion
Congratulations! By following these straightforward steps, you’ve successfully set up access to OpenAI’s powerful language models directly from your Azure account. This seamless integration eliminates the need for separate OpenAI subscriptions, simplifying the process and bringing the potential of these cutting-edge AI tools right to your doorstep.
To summarize, we’ve covered:
- Applying for access to Azure OpenAI
- Creating a resource and model deployment in your Azure account
- Configuring Python to interact with the Azure OpenAI models
With this solid foundation in place, the possibilities are endless. You can now leverage the immense capabilities of OpenAI’s language models to create intelligent applications, automate tasks, and unlock new insights. Having these tools at your disposal opens up a world of exciting opportunities.
Consider exploring some of the many potential use cases for these models, such as:
- Building chatbots and virtual assistants to enhance customer support and engagement
- Generating high-quality content for websites, social media, and marketing materials
- Analyzing large volumes of text data to extract valuable insights and trends
- Developing AI-powered tools for language translation, sentiment analysis, and more
The future of AI is bright, and with Azure OpenAI at your fingertips, you’re well-equipped to be at the forefront of this transformative technology. So go ahead, let your imagination run wild, and start building the next generation of intelligent applications today!